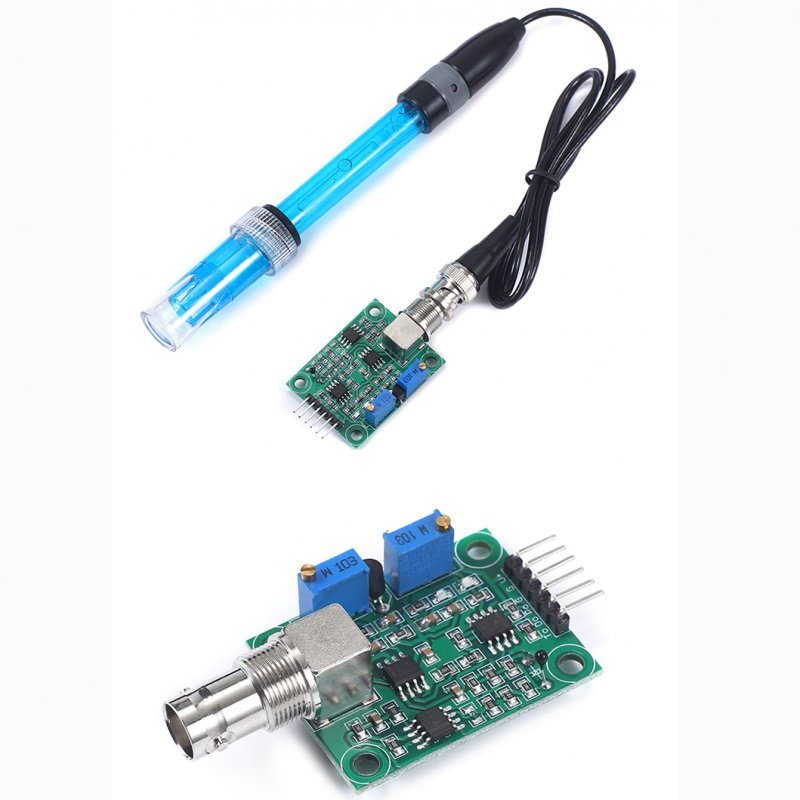


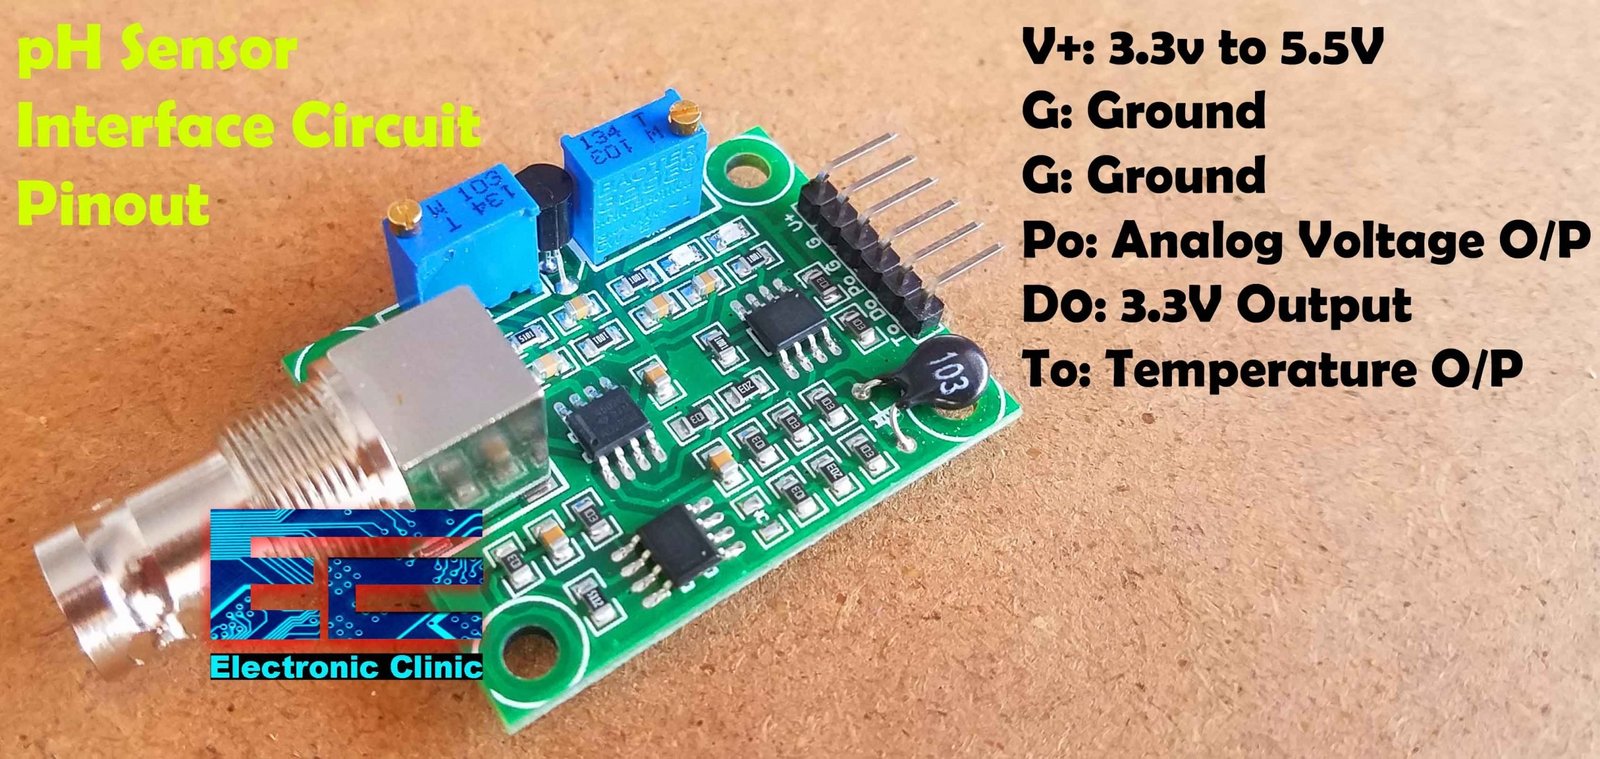
The pH Sensor interface circuit is also provided with 6 male headers which are clearly labeled as V+, this is where we connect the 3.3V or 5V from the Arduino, in my case I will connect 5 volts. But if you are planning to use this pH sensor Kit with ESP8266 or ESP32 then you will need to connect this pin with 3.3Volts. The next two pins are the ground pins, you can connect any of these two pins with the Ground pin of the Arduino. Po is the Analog output pin, which should be connected with the analog pin of the Arduino. Do is the 3.3V DC output pin. The last pin is the To which is the temperature output. Out of these 6 pins we will only use 3 pins; V+, G, and Po.
CHECK Values for different liquids:
I performed a series of tests using different liquids and once satisfied I further modified the code to display the pH value. Again I started with the Distilled water and waited for around 30 minutes to check if there can be any fluctuations in the pH value. The pH value remained almost the same.
Next I added some lemon juice to the water and I was amazed with the result. As you know the pH value of the lemon juice is 2, and the value on the display as you can see is almost 2
Next, I cleaned the pH sensor probe to measure the pH value of the Milk. For the milk too I got the correct pH value.

I also added lemon juice to the Milk to check if the value will drop. After adding the Lemon juice to the milk the value dropped. As this is a getting started tutorial; I will try to explain the maximum basic things.